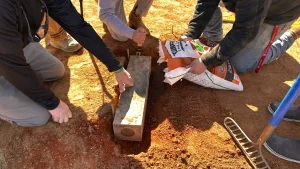
If your measurements are set and you are replacing the rubber, follow these simple steps:
- With a pick, dig out the front of the pitching rubber while leaving the rear and sides intact.
- Rake away material and remove from the pitcher’s mound.
- After front is completely exposed, pry the rubber out of the mound with a pick.
HINT: Follow these steps in a slow controlled manner so as not to break down the rear and side walls supporting the rubber. These walls are important because they clearly mark where the new rubber should be placed and they provide immediate support for the new rubber. - Spread a small amount of damp Turface® Mound Clay® in the foundation.
- Place new rubber into existing foundation.
- With a carpenter’s level, level the rubber from side to side, as well as front to back.
- Carefully refill the front wall of the rubber with damp Turface Mound Clay.
- Add packing clay to the sides and rear to replace lost materials.
- Lightly tamp the new material to compact the clay to hold the new rubber in place.